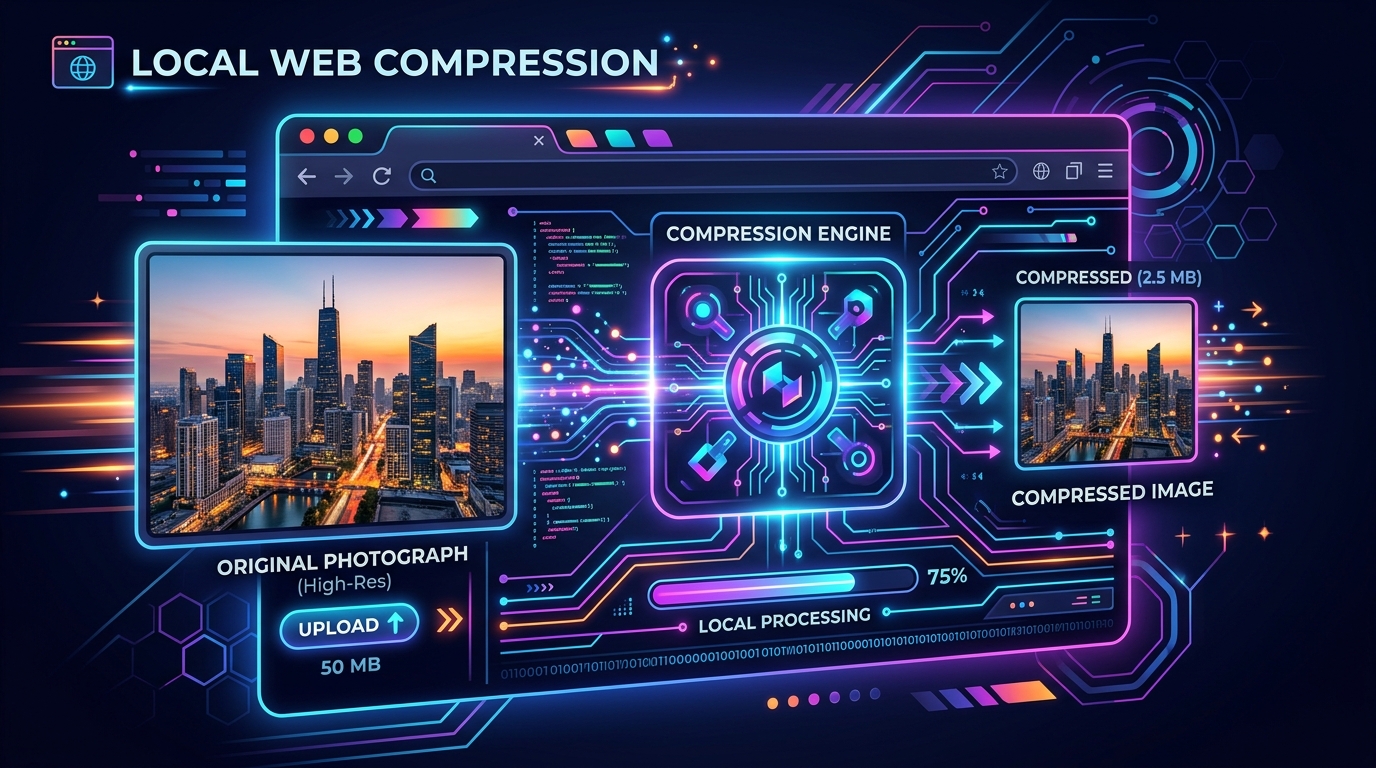
Many people assume that online image compressors upload every photo to a remote server, spin up complex backend algorithms, and eventually return a smaller file. But what if I told you that modern browser-based tools can compress massive images entirely on your device in just milliseconds?
Welcome to the hidden world of client-side image processing. Thanks to leaps in browser engine performance, native APIs, and hardware acceleration, your web browser is now a fully-fledged image processing powerhouse.
In this comprehensive guide, we will break down exactly how your browser compresses images locally. You will learn the entire lifecycle of an image file inside the browser, the APIs that make it possible, the mechanics of different compression formats, and why local processing is the ultimate win for both speed and privacy.
What Is Browser-Based Image Compression?
Browser-based image compression refers to the process of reducing an image file's size entirely within the user's web browser, using technologies like JavaScript, the Canvas API, or WebAssembly.
Unlike traditional server-side compression—where you must upload a 10MB file to a cloud server, wait for a backend processor like ImageMagick to optimize it, and then download the compressed result—browser-based compression happens locally. The image never leaves your device.
This approach has exploded in popularity for several reasons:
- Zero Latency: You eliminate network transfer times entirely.
- Absolute Privacy: Since the image never touches a server, sensitive data remains entirely under the user's control.
- Cost Efficiency: Developers don't have to pay for costly cloud compute or bandwidth to process user images.
- Offline Capabilities: Local compression tools can function entirely without an internet connection once the web app is loaded.
Modern browsers—whether Chrome, Firefox, Safari, or Edge—ship with incredibly optimized JavaScript engines (like V8) and direct access to underlying operating system graphics APIs. This transforms what used to be a heavy backend task into an instantaneous frontend operation.
How the Browser Reads an Image
Before any compression can happen, the browser must first understand the image file. It is not as simple as just "opening" the picture. Here is the step-by-step process of how your browser loads and decodes an image for processing.
1. The File Selection
When you drag and drop an image or use an <input type="file">, the browser creates a File object. This object contains metadata like the file name, size, and MIME type (e.g., image/jpeg), but it doesn't immediately load the heavy pixel data into memory.
2. Creating an Object URL or Reading as Data
To display or process the image, JavaScript needs to access its contents. We typically use URL.createObjectURL(file) to create a temporary, high-performance reference to the file in memory, or a FileReader to read it as a Base64-encoded Data URL.
3. The Decoding Phase
Next, an HTMLImageElement (<img>) or an ImageBitmap object is created and assigned the image source. This triggers the browser's native decoding pipeline.
The browser looks at the binary file structure, identifies the format (JPEG, PNG, WebP), and uncompresses the stored data into raw RGBA (Red, Green, Blue, Alpha) pixel values in memory.
4. Memory Allocation
For a 4K image (3840x2160 pixels), the browser must allocate memory for over 8.2 million pixels. Since each pixel requires 4 bytes (one for each RGBA channel), an uncompressed 4K image takes up roughly 33 Megabytes of RAM.
Workflow Diagram
[ User Selects File ] -> (File Object Created)
       |
       v
[ URL.createObjectURL() ] -> (Temporary Memory Reference)
       |
       v
[ Image Decoding ] -> (Browser decodes JPEG/PNG into raw RGBA pixels)
       |
       v
[ Memory Allocation ] -> (Raw pixels held in RAM ready for Canvas)
What Happens During Image Compression?
Once the image is loaded into memory as raw pixels, the actual compression phase begins. This is an orchestrated dance between JavaScript and native browser APIs.
The Canvas Rendering Pipeline
To manipulate the image, the browser utilizes the HTML5 Canvas API. Think of the canvas as a blank digital painting board. The JavaScript engine issues a command to "draw" the raw image pixels onto this invisible canvas.
Resizing and Interpolation
If the user chooses to reduce the dimensions of the image, the browser doesn't just cut off the edges. It uses interpolation algorithms (often bilinear or bicubic, depending on the browser's internal engine) to mathematically calculate what the new, fewer pixels should look like based on the original larger image.
Quality Adjustment and Encoding
The true magic happens during the encoding phase. The canvas API provides a method called toBlob(). When this method is invoked, you specify a target format (like image/jpeg or image/webp) and a quality parameter (a number between 0 and 1).
The browser's native graphics engine takes over. It iterates through the raw pixels on the canvas and applies the mathematical compression algorithms specific to the chosen format. For JPEG, it applies the Discrete Cosine Transform (DCT); for WebP, it uses predictive coding.
File Generation and Download
The output of toBlob() is a binary Blob (Binary Large Object) containing the fully compressed image data. This Blob can then be downloaded instantly by the user or uploaded to a server, drastically reducing the required network payload.
Why Compression Happens in Milliseconds
If you have ever used an online compressor and noticed it finishing instantly, you might wonder if it actually did anything. Why is it so fast?
Hardware Acceleration and Native Codecs
When you call canvas.toBlob(), the heavy lifting is not done in JavaScript. JavaScript simply hands the raw pixel data over to the browser's underlying C++ engine. This native engine has direct access to highly optimized graphics libraries (like Skia in Chromium-based browsers) and hardware acceleration (utilizing your computer's GPU).
WebAssembly and Multithreading
For advanced compression formats like AVIF, or when developers implement custom compression algorithms not natively supported by toBlob(), they use WebAssembly (Wasm). WebAssembly allows C, C++, or Rust code to run in the browser at near-native speeds. Combined with Web Workers, the browser can offload this intense mathematical processing to a background CPU thread, ensuring the main user interface remains smooth and responsive.
Small images (under 2MB) process in the blink of an eye because modern CPUs can crunch the pixel math in fractions of a second. Larger files (like a 20MB RAW export) might take a second or two, but it is still vastly faster than uploading that 20MB file over a standard Wi-Fi connection.
Canvas API Explained
The Canvas API is the unsung hero of frontend image processing. It is primarily used for drawing graphics via JavaScript, but its pixel-manipulation capabilities make it perfect for compression.
drawImage()
This function takes the decoded image source (an <img> element or ImageBitmap) and paints it onto the canvas. If the canvas is smaller than the original image, drawImage() scales the image down natively, providing an incredibly fast resizing mechanism.
toBlob()
This is the workhorse function. It asynchronously converts the canvas drawing into a binary Blob object. Because it runs asynchronously, it won't freeze the browser tab while encoding a large JPEG.
canvas.toBlob((blob) => {
  // We now have the compressed image file!
  console.log(`New size: ${blob.size} bytes`);
}, 'image/webp', 0.8); // 80% quality WebP
toDataURL()
Similar to toBlob(), but instead of a binary object, it returns a Base64-encoded string. While useful for generating quick preview images, it is generally avoided for final compression because Base64 strings are roughly 33% larger than their binary counterparts and consume significantly more memory.
Limitations
The Canvas API does have limitations. Extremely massive images (e.g., panoramas exceeding 16,384 x 16,384 pixels) can crash the browser tab by exceeding the maximum allowed memory allocation for a single canvas element. Furthermore, extracting the image via getImageData() for manual manipulation can be slow on mobile devices due to the heavy memory transfer back to the JavaScript context.
Browser Technologies Behind Image Compression
To understand the full ecosystem, let's look at the modern web APIs that make client-side processing so powerful.
| Technology | Role in Image Compression |
|---|---|
| Canvas API | The primary drawing board for resizing and re-encoding raw pixels into formats like JPEG or WebP. |
| OffscreenCanvas | Allows canvas operations to run in a background Web Worker, preventing the UI from freezing during heavy compression tasks. |
| ImageBitmap | An optimized interface for drawing images to a canvas without blocking the main thread. It decodes the image asynchronously. |
| Web Workers | Background threads that handle intensive JavaScript or WebAssembly calculations away from the user interface. |
| WebAssembly (Wasm) | Enables running complex C/C++ compression libraries (like MozJPEG or libavif) directly in the browser at near-native speeds. |
| FileReader / Blob | Used to read the input file and construct the final downloadable compressed output file. |
Lossy vs Lossless Compression
Understanding the difference between lossy and lossless compression is critical for optimizing images effectively.
| Feature | Lossy Compression | Lossless Compression |
|---|---|---|
| Quality | Discards hidden visual data; degrades upon repeated saves. | Retains 100% of the original pixel data. |
| File Size | Massive reduction (often 70% - 90% smaller). | Modest reduction (often 5% - 20% smaller). |
| Best For | Photographs, complex gradients, web delivery. | Logos, text-heavy graphics, medical imaging, archives. |
| Speed | Generally faster to decode, computationally heavier to encode. | Faster to encode, but results in heavier network payloads. |
| Formats | JPEG, WebP (Lossy), AVIF. | PNG, WebP (Lossless), GIF. |
When to Choose Lossy
For 95% of web development and general use cases, lossy compression is the correct choice. Setting a JPEG to 80% quality usually results in an image visually indistinguishable from the original to the naked eye, but at a fraction of the file size.
When to Choose Lossless
If you are designing a website header containing crisp typography, or optimizing a company logo with sharp geometric edges, lossy compression will introduce ugly "artifacts" (blocky noise) around the edges. In these cases, lossless formats like PNG are essential.
How Different Image Formats Are Compressed
The browser handles different formats using distinctly different mathematical approaches.
JPEG
JPEG is the undisputed king of photographic compression. It uses a lossy algorithm called the Discrete Cosine Transform (DCT). The browser divides the image into 8x8 pixel blocks. It then calculates the frequency of color changes within that block. Because human eyes are less sensitive to subtle changes in color than changes in brightness, JPEG aggressively throws away color data while preserving brightness data (chroma subsampling). This is why JPEG is terrible for sharp text but incredible for complex landscapes.
PNG
PNG (Portable Network Graphics) uses a lossless compression algorithm based on DEFLATE (the same algorithm used in ZIP files). Instead of discarding data, PNG looks for recurring patterns in the pixels. If a graphic contains a massive block of solid blue sky, PNG doesn't record the color of every single pixel; it simply records "blue pixel repeated 500 times." This makes PNG incredibly efficient for graphics with solid colors and flat design, but completely bloated for photographs. It also fully supports transparent backgrounds (an Alpha channel).
WebP
Developed by Google, WebP is the modern Swiss Army knife of web images. It supports both lossy and lossless compression, as well as animation and transparency. For lossy compression, WebP uses predictive coding (borrowed from the VP8 video codec). It looks at adjacent blocks of pixels and attempts to mathematically predict what the next block will look like. It only stores the "error" (the difference between its prediction and reality), resulting in files that are typically 25-30% smaller than JPEGs at equivalent quality levels.
AVIF
AVIF (AV1 Image File Format) is the bleeding-edge of compression technology, derived from the AV1 video codec.
It offers staggering file size reductions, easily beating WebP and JPEG while maintaining superior image quality (especially with HDR and wide color gamuts). The trade-off is performance. Encoding AVIF in the browser is computationally intense. Native browser support for AVIF encoding via toBlob() is still rolling out, meaning complex WebAssembly implementations are often required for client-side AVIF creation.
Why Local Compression Is More Private
One of the most overlooked benefits of browser-based image compression is privacy.
When you use a traditional server-side compressor, you must upload your file to their servers. Even if the company promises to delete the file after 24 hours, during that time, your image is resting on a server you don't control.
Local browser compression completely bypasses this risk:
- No Uploads: Your network activity consists solely of downloading the web application's HTML and JavaScript.
- No Cloud Storage: The image pixels are held in your local RAM. Once you close the tab, the memory is purged.
- Compliance Benefits: For businesses dealing with sensitive documents (like healthcare records or ID cards), client-side processing guarantees that no third-party server intercepts the data, greatly simplifying GDPR or HIPAA compliance.
If you are compressing confidential documents, personal photographs, or unreleased product designs, client-side tools are the only truly secure option.
Browser Compression vs Server Compression
How does the browser stack up against heavy-duty backend servers running ImageMagick? Let's compare them.
| Feature | Browser (Client-Side) | Server-Side |
|---|---|---|
| Speed (Single File) | Instantaneous (No network upload required). | Slower (Depends on upload speed and server queue). |
| Privacy | 100% Private. Files never leave your device. | Requires trusting the server operator. |
| Internet Requirement | Works offline (once the app is loaded). | Requires a constant, stable internet connection. |
| CPU Usage | Uses the user's local CPU/GPU. | Uses the provider's server CPU/GPU. |
| Large Batch Processing | Can drain laptop battery or crash if memory is low. | Better suited for processing thousands of images at once. |
| Security Risk | Zero risk of server data breaches. | Vulnerable to man-in-the-middle attacks or backend breaches. |
| Developer Complexity | Simple. Native APIs are easy to implement. | Complex. Requires managing backend servers and storage. |
For single users, bloggers, and front-end developers, browser compression is undeniably superior. Server compression only wins when dealing with massive, automated bulk processing (e.g., compressing an entire company's historical image database in one script).
Real-World Use Cases
Who benefits most from local image compression?
- Bloggers & Content Creators: Optimizing hero images and article graphics for faster CMS load times without paying for premium optimization plugins.
- Web Developers: Quickly generating optimized WebP assets using an Image Converter for frontend projects directly inside the browser.
- Photographers: Reducing high-resolution RAW exports down to manageable JPEGs for client previews or social media portfolios.
- Job Applicants: Compressing headshots or portfolio PDFs to meet the strict 2MB upload limits often found on application portals. A quick PDF to Image conversion and subsequent compression can save the day.
- E-commerce Managers: Ensuring product catalog images load instantly on mobile devices, preventing high bounce rates.
- Students & Teachers: Shrinking project files to fit into email attachments.
- Businesses: Creating optimized digital assets and leveraging tools like a QR Code Generator to share them quickly.
Performance Tips
To get the absolute best results when compressing images in your browser, follow these guidelines:
- Resize Before Compressing: If you took a photo on a 4K smartphone, but it will only be displayed as a 400px wide avatar on your website, resize the dimensions first using an Image Resizer. Compressing a 400px image yields vastly better savings than trying to highly compress a 4000px image.
- Choose the Right Format: Use JPEG for photos, PNG for logos with transparency, and WebP for the best of both worlds if browser compatibility allows it.
- Avoid Repeated Compression: Never take a compressed JPEG and compress it again. This causes "generation loss," accumulating visual artifacts. Always start from the original high-quality source file.
- Target the "Sweet Spot": For JPEG and WebP, setting the quality slider between 75% and 85% usually offers the perfect balance—drastically reducing file size before the human eye can notice any quality degradation.
- Test Visually: Don't just blindly look at file size numbers. Zoom in on high-contrast edges and look for color banding or blocking to ensure the quality is still acceptable.
Common Myths
Let's debunk some widespread misconceptions about web images and compression.
Myth: Online compressors always upload your images. Fact: As we've explored, modern tools utilize the Canvas API or WebAssembly to process files entirely locally. If a tool works offline after loading, it's not uploading your files.
Myth: Compression always ruins image quality. Fact: "Compression" is a broad term. Lossless compression reduces file size with zero quality loss. Even lossy compression at 85% quality removes only data that the human eye biologically struggles to see.
Myth: PNG is always larger than JPEG. Fact: Not always. If you compress a screenshot of a plain white page with a few lines of text, a PNG will often be much smaller and sharper than a JPEG, because PNG handles solid colors highly efficiently.
Myth: Browser compression is slower than server compression. Fact: Factoring in the time it takes to upload a 10MB photo over an average connection, the browser will finish decoding, compressing, and providing the download link before the server even finishes receiving the file.
Myth: Lossless means no optimization. Fact: Lossless optimization still restructures the binary data, removes invisible EXIF metadata (camera settings, GPS location), and optimizes the color palette without altering the visual output.
Troubleshooting
Sometimes things don't go as expected. Here is how to handle common issues:
- Compression takes too long / Browser freezes: You are likely processing an extremely large file (e.g., 50MB+) on a low-end device. The browser's memory is struggling. Try resizing the image dimensions first.
- Image quality is poor and blocky: Your quality setting is too low. Increase the slider to 80% or higher.
- Transparency disappears (turns black or white): You converted a transparent PNG into a JPEG. JPEGs do not support transparency. You must output as PNG or WebP to keep the background transparent.
- File size doesn't change much: You likely applied lossless compression, or you are trying to compress an image that has already been highly compressed previously.
- Wrong output format: Ensure you have selected the correct format from the dropdown menu in your tool. Native browser APIs default to PNG if an unsupported format is requested.
Frequently Asked Questions
Does browser image compression upload my files?
No. Modern client-side compressors process everything in your device's memory using JavaScript and native APIs. Your files are never sent to a remote server.
Can I compress images offline?
Yes! Once a client-side compressor web app is loaded in your browser, you can disconnect from the internet and continue compressing images because the processing logic is running locally on your CPU.
Why is my PNG still large after compression?
PNGs use lossless compression, meaning they prioritize quality over file size reduction. If you need a massive file size drop, you should convert the PNG to a lossy format like WebP or JPEG.
Does compression reduce resolution?
Not necessarily. "Compression" reduces file size by removing data. "Resizing" reduces resolution (pixel dimensions). A good tool allows you to do both independently or simultaneously.
Which format should I choose?
Use WebP for modern web development, JPEG for photographs if you need maximum legacy compatibility, and PNG only for graphics requiring perfect sharpness and transparency.
Is WebP better than JPEG?
In almost all scenarios, yes. WebP provides roughly 25-30% smaller file sizes than JPEGs at equivalent quality, and supports both transparency and animation.
Can browsers compress RAW images?
Natively, no. Browsers cannot decode massive RAW files (.CR2, .NEF) directly via standard APIs. However, developers can use WebAssembly modules to bring RAW decoders into the browser environment.
Does browser compression use the GPU?
Yes. When utilizing the Canvas API for resizing and rendering, modern browsers leverage hardware acceleration, offloading heavy lifting to your device's Graphics Processing Unit.
How much can I compress an image?
A heavy, unoptimized photo can often be compressed by 80% to 90% using lossy compression before visual degradation becomes unacceptable.
Will metadata be preserved?
When drawing to a Canvas and exporting via toBlob(), the browser intentionally strips out EXIF metadata (such as GPS coordinates and camera models) to save space and protect privacy.
Conclusion
Understanding how your browser compresses images pulls back the curtain on one of the most powerful capabilities of modern web development. By harnessing the Canvas API, Web Workers, and native graphics engines, browsers have turned devices into instant, private image processors.
You no longer need to rely on slow, privacy-invasive cloud servers to prepare your assets for the web. Client-side compression guarantees zero network latency, absolute data security, and massive reductions in file size.
Ready to see this technology in action? Experience the speed and privacy of local processing yourself using the free Vyrobox Image Compressor.